

💡 Key Takeaways
- Installing a smart lock is a straightforward DIY project for most homeowners.
- You’ll likely only need basic tools, often just a screwdriver, to get started.
- Understanding your existing deadbolt type is crucial before buying a new smart lock.
- Following step-by-step instructions carefully helps prevent common installation issues.
- A smart lock enhances convenience and security without requiring professional help.
“Smart locks are more than just convenience; they represent a fundamental shift in how we perceive and manage home security. Their integration with broader smart home ecosystems is the next frontier, offering unparalleled control and peace of mind.”
— Dr. Evelyn Reed, IoT Security Strategist
Upgrading your home’s security and convenience often starts at the front door. Traditional deadbolts are reliable, but a smart lock elevates your home access, offering remote control, keyless entry, and seamless integration with your wider smart home ecosystem. While the idea of replacing your existing lock might seem daunting, installing an electronic deadbolt is a surprisingly straightforward DIY project that most tech-savvy homeowners can complete in under an hour. This guide will walk you through the smart-lock-installation process, ensuring your home security upgrade is smooth and successful.
Contents
- Before You Begin: Essential Considerations for Your Smart Lock
- Compatibility with Your Door
- Understanding Smart Lock Connectivity Protocols
- Power Source
- Tools You’ll Need
- Introducing a Modern Solution: The Schlage Encode Smart WiFi Deadbolt
- Step-by-Step Smart Lock Installation Guide
- Step 1: Remove Your Old Deadbolt
- Step 2: Install the New Deadbolt Latch
- Step 3: Install the Exterior Keypad/Assembly
- Step 4: Install the Interior Mounting Plate
- Step 5: Connect the Cable and Install the Interior Assembly
- Step 6: Install Batteries and Cover
- Step 7: Test and Calibrate
- Connecting Your Smart Lock to Your Smart Home Ecosystem
- App Setup and Pairing
- Voice Assistant Integration
- Integrating with Other Smart Devices
- Security Best Practices for Your Smart Lock
- Conclusion
Before You Begin: Essential Considerations for Your Smart Lock
Before you even unbox your new smart door lock, a little planning goes a long way. Understanding compatibility, connectivity protocols, and power sources will save you time and potential headaches.
Compatibility with Your Door
Not all smart locks fit all doors. Most are designed to replace standard deadbolts, but it’s crucial to measure your existing hardware:
- Door Thickness: Standard doors are typically 1 3/8 inches to 1 3/4 inches thick. Check your lock’s specifications for its supported range.
- Backset: This is the distance from the edge of the door to the center of the bore hole (where the deadbolt cylinder goes). Common backsets are 2 3/8 inches (60mm) or 2 3/4 inches (70mm).
- Cross Bore and Edge Bore Diameter: These are the diameters of the holes drilled into your door for the lock. Most smart locks are designed for standard 2 1/8 inch cross bores and 1 inch edge bores.
Understanding Smart Lock Connectivity Protocols
Your smart lock’s ability to communicate with your other devices and your phone depends on its connectivity protocol. This is where terms like Wi-Fi, Bluetooth, Z-Wave, and Zigbee come into play.
- Wi-Fi: Connects directly to your home’s Wi-Fi network. Often requires no separate hub, offering simplicity but can consume more battery and potentially increase network traffic.
- Bluetooth: Ideal for short-range communication, typically within a few feet of the lock. Great for proximity-based unlocking but generally doesn’t offer remote access without a bridge device.
- Z-Wave & Zigbee: These are low-power wireless mesh network protocols designed specifically for smart home devices. They require a dedicated hub (like SmartThings, Hubitat, or a compatible Alexa/Google device with a built-in hub) to connect to your home network and offer excellent battery life and reliable connections with low latency. These protocols contribute to a robust smart home ecosystem.
- Thread: A newer, IP-based mesh networking protocol, often paired with Bluetooth Low Energy. It’s designed for low power consumption and high reliability, foundational for Matter-compatible devices.
Choosing the right protocol is key to building a cohesive smart home. For a comprehensive overview of securing your entire digital abode, consult The Ultimate Smart Home Security Guide.
Power Source
Most smart locks are battery-powered, typically using AA or AAA batteries, which can last from six months to a year depending on usage and connectivity type. Some professional-grade locks might offer hardwired options, but for DIY installation, battery-powered models are standard.
Tools You’ll Need
Gathering your tools beforehand ensures a smooth installation process. You won’t need much beyond basic household items:
- Phillips Head Screwdriver
- Flathead Screwdriver (optional, for prying)
- Measuring Tape (for pre-installation checks)
- Pencil (optional, for marking)
- Your new smart lock and its installation guide
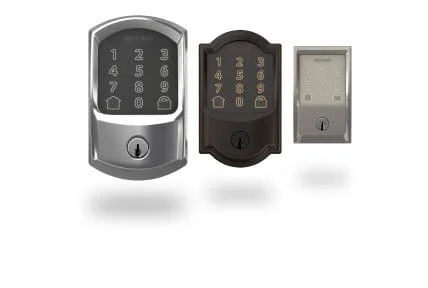
Introducing a Modern Solution: The Schlage Encode Smart WiFi Deadbolt
When considering an intelligent upgrade for your entryway, the Schlage Encode Smart WiFi Deadbolt stands out as a prime example of a modern, user-friendly smart lock. What makes it particularly appealing for DIY enthusiasts is its built-in Wi-Fi, which eliminates the need for an additional hub, connecting directly to your home network. This simplifies the setup process significantly, allowing you to control the lock remotely, create unique access codes, and view lock activity from anywhere via the Schlage Home app, all without extra hardware.
The Encode series exemplifies how an electronic deadbolt can integrate seamlessly into a connected home, offering robust security features like a durable touchscreen keypad and an alarm that senses forced entry. It’s a testament to how far home security has come, blending traditional strength with cutting-edge connectivity for a truly smart-door-lock experience. For an in-depth look at other popular models, be sure to read our In-Depth Review: The August Wi-Fi Smart Lock (4th Gen).
Recommended Product: Schlage Encode Smart WiFi Deadbolt
See the latest price and user reviews on Amazon.
Step-by-Step Smart Lock Installation Guide
Now, let’s get down to the actual installation. While specific steps might vary slightly by model, the general process remains consistent for most electronic deadbolts.
Step 1: Remove Your Old Deadbolt
Before you install the new one, the old lock has to go. This is usually the easiest part.
- Use a Phillips head screwdriver to remove the two screws on the interior side of your existing deadbolt’s cover plate.
- Carefully remove the interior and exterior portions of the deadbolt. The deadbolt latch (the part that extends into the door frame) should now slide out from the edge of the door.
- If you also have a doorknob/lever set that’s not a smart lock, you may need to remove it as well, or at least ensure it won’t interfere with the new smart lock’s components.
Step 2: Install the New Deadbolt Latch
The latch mechanism is the core of the lock, extending and retracting to secure your door.
- Insert the new latch into the hole on the edge of your door. Ensure the „up” arrow or appropriate marking is facing the correct direction.
- Verify that the latch is oriented correctly for your door’s swing (some latches are reversible, others have specific instructions for left/right-handed doors).
- Secure the latch with the screws provided by your smart lock manufacturer.
Step 3: Install the Exterior Keypad/Assembly
This is the part of the smart lock with the keypad or key cylinder that sits on the outside of your door.
- Feed the data cable (if applicable) from the exterior assembly through the cross bore hole in your door, underneath the latch mechanism.
- Position the exterior assembly flush against the door, ensuring the key cylinder (if present) aligns with the latch’s tailpiece.
Step 4: Install the Interior Mounting Plate
This plate provides the base for the interior smart lock assembly.
- Align the mounting plate on the inside of the door, ensuring the data cable passes through the opening.
- Secure the mounting plate to the exterior assembly using the long screws provided. Tighten them evenly to ensure the lock is square and snug against the door. Avoid over-tightening.
Step 5: Connect the Cable and Install the Interior Assembly
The interior assembly houses the motor, batteries, and electronics.
- Carefully connect the data cable from the exterior assembly to the corresponding port on the interior assembly. This connection is usually a small plastic plug that clicks into place.
- Align the interior assembly with the mounting plate, ensuring the tailpiece from the latch correctly engages the rotation mechanism of the interior assembly.
- Secure the interior assembly to the mounting plate with the remaining screws.
Step 6: Install Batteries and Cover
Power up your smart lock!
- Insert the specified batteries (usually AA or AAA) into the battery compartment. Pay attention to polarity.
- Attach the interior cover plate. It often slides on or clicks into place.
Step 7: Test and Calibrate
The final crucial step is to ensure everything works correctly.
- Most smart locks will perform an automatic „door handing” or calibration process once powered on. Follow the on-screen prompts or app instructions. This teaches the lock which way the door swings and how far to extend the deadbolt.
- Manually test the lock using the keypad and/or key. Ensure the deadbolt extends and retracts smoothly without binding.
- Open and close the door a few times and test again to ensure proper alignment.
Recommended Video
Connecting Your Smart Lock to Your Smart Home Ecosystem
Once physically installed, the real power of your smart lock comes from its integration with your digital life. This is where your smart home becomes truly „smart.”
App Setup and Pairing
Your smart lock will have a dedicated mobile app (e.g., Schlage Home, August Home, Yale Access). Download it and follow the in-app instructions to pair your new lock. This typically involves Bluetooth pairing for initial setup, then connecting it to your Wi-Fi or smart home hub.
Voice Assistant Integration
Many smart locks are compatible with popular voice assistants like Amazon Alexa and Google Assistant. Linking your lock allows for voice commands such as „Alexa, lock the front door” or „Hey Google, is the front door locked?” For advanced home automation, learn How to Create Automated Security Routines with Alexa, combining your lock with other devices.
Integrating with Other Smart Devices
The true magic of a smart home lies in its interconnectedness. Your smart lock can trigger or be triggered by other devices:
- Security Cameras: Set your smart security cameras to start recording if an unrecognized code is entered, or if the door is unlocked when no one is home. For more on these, check out the Best Smart Security Cameras of the Year.
- Video Doorbells: If someone rings your video doorbells, you can see who it is and unlock the door remotely from the same app. A popular comparison can be found in Ring Video Doorbell vs. Nest Doorbell: Which is Best for You?
- Smart Lighting: Have your smart lighting turn on automatically when the door is unlocked after sunset.
- Smart Thermostats: Adjust your smart thermostats to an „away” setting when the door is locked from the outside, saving energy.
Security Best Practices for Your Smart Lock
While the convenience of a smart lock is undeniable, maintaining strong digital security is paramount. A smart door lock is a critical component of your home’s perimeter defense.
- Strong Passwords and PINs: Use complex passwords for your smart lock app and unique, non-guessable PINs for the keypad.
- Multi-Factor Authentication (MFA): Enable MFA on your smart home accounts whenever possible. This adds an extra layer of security beyond just a password.
- Regular Firmware Updates: Keep your smart lock’s firmware updated. Manufacturers frequently release updates that patch vulnerabilities and improve performance.
- Guest Access Management: Create temporary codes for visitors and delete them as soon as they are no longer needed. Monitor activity logs for unusual access.
- Network Security: Ensure your home Wi-Fi network is secure with a strong password and WPA2/WPA3 encryption. Consider creating a guest network for visitors to keep your main network isolated. For broader smart home security concerns, understand What to Do if Your Smart Home Gets Hacked.
- Understanding Data Encryption: Know that your lock’s communications are encrypted. This is similar to how Understanding End-to-End Encryption in Security Cameras ensures your video feeds are private.
Conclusion
Installing a smart lock is an accessible and impactful home security upgrade. By following these steps and understanding the underlying technology, you can confidently transform your entryway into a keyless, connected portal. The benefits—from remote access to integrated home automation and enhanced security features—make the DIY effort well worth it. Embrace the future of home access and enjoy the peace of mind that comes with a truly smart home.
Frequently Asked Questions
Do I need special tools to install a smart lock?
Most smart locks are designed for DIY installation and primarily require only a Phillips head screwdriver, which you likely already own.
Can I install a smart lock myself, or do I need a professional?
Yes, the majority of smart locks are engineered for homeowners to install themselves, often taking less than 30 minutes. Professional help is usually not needed.
What if my existing deadbolt isn’t compatible?
While most smart locks fit standard deadbolt boreholes, it’s crucial to check compatibility before purchasing. Our guide helps identify common deadbolt types.
