

💡 Key Takeaways
- Installing a smart lock is a straightforward DIY project for most homeowners.
- Most smart locks are designed to replace standard deadbolts without complex wiring.
- Having the right tools and knowing common pitfalls can make the installation process much smoother.
- Upgrading to a smart lock significantly enhances your home’s security and convenience.
“Smart locks are no longer just a convenience; they are becoming the cornerstone of a truly integrated and proactive smart home security system, offering peace of mind directly from your smartphone.”
— Dr. Lena Sharma, Lead IoT Security Strategist
Upgrading your home security doesn’t have to be a daunting task reserved for professional installers. With the proliferation of user-friendly smart home devices, taking control of your front door’s security is now a practical DIY project. A smart lock offers unparalleled convenience, enhanced control, and often a robust layer of security that traditional deadbolts simply can’t match. This guide will walk you through the process of installing a smart lock on your front door, making your home smarter and more secure.
Contents
- Why Upgrade to a Smart Lock?
- Before You Begin: Preparation is Key
- Check Your Door’s Compatibility
- Gather Your Tools
- Understand Connectivity Protocols
- Choosing Your Smart Lock: A Practical Example
- Recommended Product
- Step-by-Step Installation Guide
- 1. Remove Your Old Deadbolt
- 2. Install the New Latch/Bolt
- 3. Install the Strike Plate (If Necessary)
- 4. Install the Exterior Assembly
- 5. Install the Interior Mounting Plate
- 6. Connect the Interior Assembly
- 7. Secure the Interior Assembly Cover
- 8. Insert Batteries and Test
- App Setup and Smart Home Integration
- Download the Manufacturer’s App
- Pair Your Smart Lock
- Configure User Codes and Settings
- Integrate with Your Smart Home Ecosystem
- Smart Lock Security Best Practices
- Troubleshooting Common Issues
- Conclusion
Why Upgrade to a Smart Lock?
The appeal of a smart lock extends far beyond simply replacing a traditional key. These devices connect to your home network, providing remote access, real-time alerts, and seamless integration with other smart home components. Imagine unlocking your door for a family member from miles away, receiving notifications when your kids arrive home, or ensuring your door is locked every night without a second thought.
Smart locks offer features like keyless entry via numeric codes, app control, and even voice commands through assistants like Alexa or Google Home. This connectivity not only adds convenience but also significantly bolsters your home security posture, giving you peace of mind and greater control over who enters your property.
Before You Begin: Preparation is Key
Before you unbox your new smart lock, a little preparation goes a long way. Ensuring compatibility and having the right tools on hand will make the installation process smooth and hassle-free.
Check Your Door’s Compatibility
Most smart locks are designed to fit standard American doors, but it’s crucial to verify your door’s specifications. Pay attention to:
- Door Thickness: Typically between 1 ⅜ inches and 2 ¼ inches.
- Backset: The distance from the edge of the door to the center of the bore hole (usually 2 ⅜ inches or 2 ¾ inches).
- Cross Bore Hole Diameter: The main hole where the lock cylinder passes through (usually 2 ⅛ inches).
- Edge Bore Hole Diameter: The smaller hole on the edge of the door for the latch (usually 1 inch).
Most smart locks come with adjustable backset mechanisms to accommodate both standard sizes, but always double-check the product specifications against your door.
Gather Your Tools
You won’t need an extensive toolkit, but having these basics will be helpful:
- Phillips Head Screwdriver (often included with the lock)
- Flat Head Screwdriver (optional, for prying)
- Measuring Tape or Ruler
- Pencil (for marking)
- Drill (only if modifying your door, which is rare for standard installations)
Understand Connectivity Protocols
Smart locks utilize various wireless communication protocols to connect to your home network and other devices. Understanding these will help you choose the right lock for your existing smart home ecosystem:
- Wi-Fi: Connects directly to your home Wi-Fi network, often requiring no additional hub. Offers robust remote access.
- Bluetooth: Ideal for local control when you’re within close proximity. Some locks use Bluetooth for initial setup and then bridge to Wi-Fi.
- Z-Wave & Zigbee: These are low-power mesh network protocols that require a compatible smart home hubs (like SmartThings or Hubitat) to connect to your home network. They are excellent for reliability and battery life, creating a strong interconnected system with other devices like smart thermostats.
Consider your current smart home setup. If you already have a Z-Wave hub, a Z-Wave smart lock might be the most seamless integration. If you prefer simplicity, a Wi-Fi or Bluetooth-enabled smart locks might be better.
Choosing Your Smart Lock: A Practical Example
When selecting a smart locks, consider factors like ease of installation, connectivity options, battery life, and overall design. Many excellent options exist on the market, catering to different needs and budgets. Some, like the August Wi-Fi Smart Lock, replace only the interior thumbturn, allowing you to keep your existing exterior hardware and keys. Others, like the one we’ll use as an example, replace the entire deadbolt for a complete aesthetic and functional upgrade.
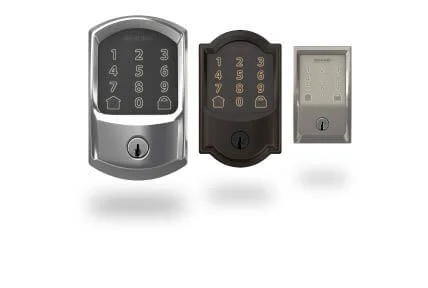
A popular choice for its blend of security, convenience, and direct Wi-Fi connectivity is the Schlage Encode Smart WiFi Deadbolt. This lock is designed for straightforward installation, fitting standard door preparations without needing extra wiring or a separate hub. It connects directly to your home’s Wi-Fi, allowing you to manage access codes, view activity logs, and lock/unlock your door remotely via the Schlage Home app. It also integrates seamlessly with Amazon Alexa and Google Assistant, enabling voice control and linking with other smart devices like video doorbells for a unified security system.
Step-by-Step Installation Guide
While specific steps may vary slightly by model, the general process for installing most deadbolt-style smart locks is remarkably similar to installing a traditional one. Always refer to your lock’s specific instruction manual for detailed, model-specific guidance.
1. Remove Your Old Deadbolt
This is often the easiest part. Using your Phillips head screwdriver, unscrew the two screws on the interior side of your existing deadbolt that hold the two halves together. Once the screws are removed, the exterior and interior portions of the deadbolt should separate. Pull out the latch/bolt mechanism from the edge of the door.
2. Install the New Latch/Bolt
Insert the new latch mechanism that came with your smart lock into the edge bore hole of your door. Ensure the „up” arrow or indicator is facing the correct direction, usually upwards. Secure it with the provided screws. Make sure the bolt extends and retracts smoothly when operated manually.
3. Install the Strike Plate (If Necessary)
While often reusable, if your new smart lock comes with a new strike plate (the metal plate on the door frame where the bolt extends into), install it now. Line it up with the existing holes, or mark and drill new pilot holes if required, then secure it with screws.
4. Install the Exterior Assembly
Feed the data cable from the exterior keypad/assembly through the cross bore hole in your door, ensuring the tailpiece (the flat bar that rotates the bolt) slides into the slot on the latch mechanism. The exterior assembly should sit flush against the door.
5. Install the Interior Mounting Plate
On the interior side of the door, align the mounting plate over the exterior assembly’s tailpiece and data cable. Use the long screws provided to secure the mounting plate to the exterior assembly through the door. Hand-tighten these screws evenly until the exterior unit is snug and plumb, but avoid overtightening.
6. Connect the Interior Assembly
Carefully connect the data cable from the exterior assembly to the corresponding port on the interior assembly of the smart lock. Many connections are keyed, so they only fit one way. Ensure it clicks securely into place. Then, slide the interior assembly onto the mounting plate, aligning the tailpiece with the turn-piece mechanism.
7. Secure the Interior Assembly Cover
Once the interior assembly is properly seated and aligned, secure it to the mounting plate with the remaining screws, typically two on the sides or bottom. Again, hand-tighten until snug.
8. Insert Batteries and Test
Open the battery cover on the interior assembly and insert the specified number and type of batteries (usually AA or AAA). Most smart locks will emit a sound or light up upon receiving power. Manually test the deadbolt by turning the thumb-turn on the interior and ensure the bolt extends and retracts fully and smoothly without catching.
Pro Tip: Do this test with the door open first, then try it with the door closed to ensure proper alignment with the strike plate.
Recommended Video
App Setup and Smart Home Integration
With the physical installation complete, the next crucial step is to get your smart lock connected and integrated into your digital home.
Download the Manufacturer’s App
Most smart locks require a dedicated app for setup and daily management. Download the app (e.g., Schlage Home, August, Yale Access) from your smartphone’s app store.
Pair Your Smart Lock
Follow the in-app instructions to pair your lock. This usually involves creating an account, selecting your specific lock model, and then initiating a pairing mode on the lock itself (often by pressing a button). The app will guide you through connecting the lock to your home Wi-Fi network or smart home hub.
Configure User Codes and Settings
Once paired, you can now:
- Create unique entry codes for family members, guests, or service providers.
- Set up schedules for specific codes (e.g., a dog walker’s code only works between 10 AM and 2 PM).
- Enable auto-lock features to ensure your door locks itself after a set period.
- Review activity logs to see who entered and when.
- Adjust sensitivity settings for auto-unlock features if available.
Integrate with Your Smart Home Ecosystem
This is where the true power of a smart lock shines. Integrate your lock with voice assistants like Amazon Alexa or Google Assistant, or smart home platforms like Apple HomeKit, SmartThings, or IFTTT. This allows for:
- Voice Control: „Alexa, lock the front door.” (with a security pin for unlocking).
- Automated Routines: Create routines where locking the front door at night also turns off lights, arms your security cameras, or activates an „Away” scene. Learn how to create automated security routines with Alexa.
- Unified Monitoring: Get a holistic view of your home’s security status alongside your video doorbells and security cameras. If you’re encountering issues, a guide on solving common problems with your Ring security camera might also be helpful for your wider security system.
Smart Lock Security Best Practices
While convenient, a smart lock is only as secure as its implementation. Adhere to these best practices to maximize your home’s safety:
- Use Strong, Unique Passwords: For your smart lock app and any connected smart home accounts. Enable two-factor authentication (2FA) wherever possible.
- Regular Firmware Updates: Always install firmware updates for your lock. These often include critical security patches and performance improvements.
- Limit User Codes: Only provide codes to trusted individuals and delete them when no longer needed. Consider temporary or scheduled codes for visitors.
- Monitor Activity Logs: Regularly check your lock’s activity log for any unusual entry attempts or unexpected activity.
- Be Mindful of Voice Control: Implement a voice PIN for unlocking your door via voice assistants to prevent unauthorized access.
- Secure Your Home Network: Ensure your Wi-Fi network is strong, using WPA2 or WPA3 encryption, and a robust password. Understand principles like end-to-end encryption in security cameras, which apply broadly to smart home security.
- Know What to Do If Compromised: In the rare event of a security breach, know what to do if your smart home gets hacked.
Troubleshooting Common Issues
Even with careful installation, you might encounter minor hiccups. Here are a few common issues and solutions:
- Lock Not Calibrating/Turning Smoothly: Check alignment of the interior and exterior assemblies. Ensure the screws aren’t overtightened, causing binding. The latch bolt might also be rubbing against the strike plate; adjust the strike plate if needed.
- Connectivity Problems: If your Wi-Fi lock loses connection, check your router’s signal strength at the door. If using a hub, ensure the hub is online and within range. A simple restart of the lock (removing and reinserting batteries) or your router can often resolve temporary glitches.
- Battery Drain: Frequent usage, weak Wi-Fi signal (forcing the lock to work harder), or low-quality batteries can lead to faster drain. Use reputable brand-name batteries and ensure a strong connection.
Conclusion
Installing a smart lock is an accessible and highly rewarding upgrade for any homeowner looking to enhance their security and convenience. By following these steps and understanding the underlying technology, you can confidently transform your front door into a powerful entry point for your smart home ecosystem. Enjoy the peace of mind that comes with knowing your home is secure, and effortlessly accessible with just a tap or a voice command.
Frequently Asked Questions
Do I need special wiring to install a smart lock?
No, most residential smart locks are battery-powered and designed to replace your existing deadbolt without requiring new electrical wiring.
How long does a typical smart lock installation take?
For most beginners, installing a smart lock can take between 15 to 45 minutes, depending on your comfort level with DIY projects.
What tools will I need for installation?
You’ll typically need a Phillips head screwdriver, a tape measure, and sometimes a flathead screwdriver or a drill, though many installations only require the first two.
