

💡 Key Takeaways
- Upgrading to a smart lock significantly enhances home security and offers keyless convenience.
- Most smart lock installations are straightforward DIY projects, requiring basic tools and patience.
- Understanding your door type and existing deadbolt is crucial before purchasing a new smart lock.
- Following a step-by-step guide helps avoid common installation pitfalls and ensures proper function.
“Smart locks are no longer just a luxury; they’re becoming an indispensable layer of modern home security, empowering homeowners with control and peace of mind directly from their smartphones. The ease of DIY installation is truly democratizing advanced security.”
— Dr. Evelyn Reed, Smart Home Technology Futurist
Upgrading your home security doesn’t have to be a daunting task reserved for professional installers. With the proliferation of user-friendly smart home devices, taking control of your front door’s security is now a practical DIY project. A smart lock offers not just enhanced security, but also unparalleled convenience, allowing you to monitor and control access to your home from anywhere in the world. This comprehensive guide will walk you through the process of installing a smart lock on your front door, transforming your entry point into a connected, intelligent gateway.
Whether you’re looking to eliminate physical keys, grant temporary access to guests, or simply integrate your entry system into a broader smart home ecosystem, installing a smart lock is a highly impactful upgrade. Let’s dive in and demystify the process.
Contents
- Why Upgrade to a Smart Lock?
- Choosing the Right Smart Lock
- Before You Begin: Preparation is Key
- Step-by-Step Installation Guide
- Step 1: Remove Your Old Deadbolt
- Step 2: Install the New Deadbolt Latch
- Step 3: Install the Exterior Assembly (Keypad/Key Cylinder)
- Step 4: Attach the Interior Mounting Plate
- Step 5: Attach the Interior Assembly
- Step 6: Test and Calibrate
- Connecting Your Smart Lock to Your Smart Home Ecosystem
- Recommended Product
- Post-Installation Best Practices & Security Tips
Why Upgrade to a Smart Lock?
The decision to switch from a traditional deadbolt to a smart lock brings a host of benefits that extend beyond simple convenience. It’s about enhancing control, security, and integration within your home.
- Unparalleled Convenience: Say goodbye to fumbling for keys. Most smart locks offer keyless entry via keypad codes, smartphone apps, or even fingerprint recognition. You can lock or unlock your door remotely, an invaluable feature if you’re away and need to let someone in, or if you forgot to lock up before leaving.
- Enhanced Security Features: Smart locks provide real-time alerts if your door is tampered with or left ajar. Many models include built-in alarms and activity logs, letting you see who entered and when. You can issue temporary or time-sensitive access codes for visitors, cleaners, or contractors, which automatically expire, eliminating the need for key handovers. For a broader understanding of protecting your home, delve into what to do if your smart home gets hacked, as this applies to all connected devices.
- Seamless Smart Home Integration: A smart lock can become a pivotal part of your smart home automation. Imagine your doors automatically locking when your security system is armed, or your lights turning on when you unlock the front door after dark. These devices often integrate with voice assistants like Alexa and Google Assistant, and can even trigger routines based on activity detected by a PIR motion sensor or a smart doorbell.
Choosing the Right Smart Lock
Before you begin the installation, selecting the right smart lock for your needs is crucial. The market offers a wide array of options, each with unique features and connectivity protocols. Consider these factors when making your choice.
- Type of Lock: Smart locks generally come as either a full deadbolt replacement or a conversion kit that attaches to your existing deadbolt’s interior thumb turn. Full replacements offer more integrated features, while conversion kits are often simpler to install and allow you to keep your existing keys and exterior hardware. For an in-depth look at a popular conversion option, check out our In-Depth Review: The August Wi-Fi Smart Lock (4th Gen).
- Connectivity Protocol: This determines how your lock communicates with your smartphone and other smart home devices.
- Wi-Fi: Offers direct connection to your home network for remote access without a separate hub. Can consume more battery.
- Bluetooth: Ideal for direct control when you’re within close range. Requires a hub or Wi-Fi bridge for remote access.
- Z-Wave/Zigbee: These are low-power mesh network protocols common in smart home ecosystems. They require a compatible smart home hub (e.g., SmartThings, Hubitat) but offer excellent reliability and battery life.
Understanding these protocols is key to ensuring your lock fits into your existing smart home ecosystem.
- Compatibility: Most smart locks are designed to fit standard residential doors with specific bore hole sizes (typically 2 1/8 inches) and backsets (2 3/8 or 2 3/4 inches). Always measure your door’s thickness and existing lock’s dimensions to ensure compatibility.
- Key Features: Beyond basic locking and unlocking, consider features like keypads for code entry, fingerprint readers, auto-lock functionality, tamper alarms, and voice assistant compatibility.
Before You Begin: Preparation is Key
A smooth installation process starts with thorough preparation. Gather your tools and familiarize yourself with your new smart lock’s specific instructions, as minor variations can exist between brands.
- Gather Your Tools: You’ll typically only need a Phillips head screwdriver. A tape measure might be useful to verify door dimensions if you haven’t already.
- Read the Manual: Every smart lock comes with a detailed installation guide. Read it from start to finish before touching a screwdriver. Pay attention to diagrams and specific torque requirements for screws.
- Check Door Alignment: Ensure your door closes smoothly and the existing deadbolt operates without sticking. A misaligned door can cause issues with any deadbolt, smart or not. If your door isn’t aligned, address that first.
- Install Batteries: Most smart locks are battery-powered. While many advise waiting until the end, some preliminary steps might require power. Have fresh batteries on hand.
Step-by-Step Installation Guide
This guide covers the general process for installing a full deadbolt replacement smart lock, which is the most common type for a comprehensive upgrade. Always refer to your specific lock’s manual for precise steps.
Step 1: Remove Your Old Deadbolt
This is usually the easiest part. Start by ensuring your door is open and secure so it won’t accidentally close on you.
- Unscrew the Interior Thumb Turn: Locate the two screws that hold the interior thumb turn assembly to the door. Use a Phillips head screwdriver to remove them.
- Remove the Exterior Key Cylinder: Once the interior piece is off, the exterior key cylinder can typically be pulled straight out.
- Remove the Deadbolt Latch: Next, remove the two screws holding the latch mechanism in the edge of the door. Pull the latch assembly out of the door frame.
You should now have an empty bore hole in your door and an empty strike plate hole in your door frame.
Step 2: Install the New Deadbolt Latch
The latch is the metal bolt that extends from the door into the frame when locked.
- Insert the Latch: Slide the new smart lock’s deadbolt latch into the hole on the edge of your door. Ensure it’s oriented correctly (the „up” indicator or arrow should be pointing up). Many latches are adjustable for different backsets (the distance from the door edge to the center of the bore hole) – adjust if necessary.
- Secure the Latch: Use the provided screws to secure the latch plate to the edge of the door. Do not overtighten; just snug.
Step 3: Install the Exterior Assembly (Keypad/Key Cylinder)
This is the part of the lock that sits on the outside of your door, often containing a keypad or traditional key cylinder.
- Route the Cable: Carefully feed the data cable from the exterior assembly through the bore hole in your door, ensuring it’s not pinched.
- Position the Assembly: Align the exterior assembly so the tailpiece (the metal bar that engages the latch) slides through the central opening of the deadbolt latch mechanism.
- Hold in Place: Keep the exterior assembly flush against the door while you prepare the interior mounting plate.
Step 4: Attach the Interior Mounting Plate
This plate provides the base for the interior electronic assembly.
- Position the Plate: Place the interior mounting plate on the inside of the door, aligning its screw holes with the posts extending from the exterior assembly. The data cable should pass through the designated opening in the plate.
- Secure the Plate: Use the long screws provided to attach the mounting plate to the exterior assembly. Tighten these screws evenly until the exterior assembly is snug against the door, but avoid excessive force that could damage the door or lock.
Step 5: Attach the Interior Assembly
This is the electronic brains of your smart lock, housing the battery pack and thumb turn.
- Connect the Cable: Carefully connect the data cable from the exterior assembly to the appropriate port on the interior assembly. Ensure the connector clicks securely into place.
- Align the Tailpiece: Align the tailpiece from the deadbolt latch with the slot on the interior assembly’s thumb turn or motor housing.
- Secure the Interior Assembly: Slide the interior assembly onto the mounting plate, ensuring all components align. Use the shorter screws provided to secure the interior assembly to the mounting plate.
- Install Batteries: Insert the required batteries (usually AA) into the battery pack as per the instructions.
Step 6: Test and Calibrate
Once the physical installation is complete, it’s time to bring your smart lock to life.
- Manual Test: Operate the thumb turn manually to ensure the deadbolt extends and retracts smoothly without rubbing.
- Electronic Calibration: Your smart lock will likely perform an automatic calibration cycle when batteries are inserted or during initial setup. Follow your lock’s specific instructions for this. This teaches the lock the full throw distance of the deadbolt.
- Test with Codes/App: Once calibrated, test the lock using the default keypad code (if applicable) and through its dedicated smartphone app.
Connecting Your Smart Lock to Your Smart Home Ecosystem
The true power of a smart lock lies in its connectivity. Most smart locks require their own dedicated app for initial setup and management, but can then be integrated into broader smart home platforms.
First, download the manufacturer’s app and follow the on-screen instructions to pair your new smart lock. This typically involves creating an account, adding the device, and connecting it to your home’s Wi-Fi network or a compatible hub. If your lock uses Z-Wave or Zigbee, you’ll pair it through your existing smart home hub (e.g., SmartThings, Hubitat, or a dedicated gateway for your security cameras).
Once connected, explore integrations with voice assistants like Amazon Alexa or Google Assistant. This allows for voice control („Alexa, lock the front door”) and the creation of custom routines. For instance, you could create automated security routines with Alexa that arm your alarm, turn off lights, and lock your doors when you say „Goodnight.”
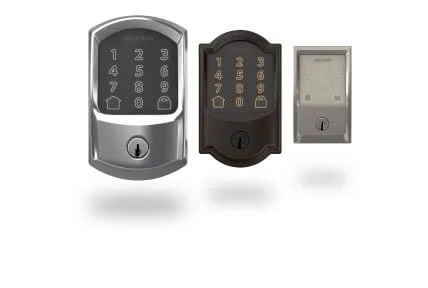
A prime example of a user-friendly, connected smart lock is the Schlage Encode Smart WiFi Deadbolt. This lock stands out for its direct Wi-Fi connectivity, eliminating the need for an additional hub, which simplifies the setup process for many users. It offers a touchscreen keypad for code entry, integrates seamlessly with the Schlage Home app for remote control and access management, and is compatible with Amazon Alexa and Google Assistant for voice commands and smart home routines. Its robust design and built-in alarm make it a strong contender for a secure and convenient front door upgrade, exemplifying how modern smart locks can enhance both security and daily living.
Post-Installation Best Practices & Security Tips
Installing your smart lock is just the first step. To maximize its security and functionality, follow these best practices:
- Change Default Codes: Immediately change any default master codes or PINs. Create unique, strong codes for family members and guests.
- Enable Auto-Lock: Many smart locks can automatically lock themselves after a set period, ensuring your door is never left unsecured.
- Regular Software Updates: Keep your lock’s firmware updated. Manufacturers frequently release updates that patch security vulnerabilities and add new features.
- Strong Wi-Fi Password & Two-Factor Authentication (2FA): Ensure your home Wi-Fi network has a strong, unique password. Enable 2FA on your smart lock’s app and any connected smart home platforms to add an extra layer of security against unauthorized access.
- Monitor Activity Logs: Regularly check your lock’s activity log through its app. This provides an audit trail of who entered and when. If you’re also using devices like video doorbells or security cameras, cross-referencing these logs can provide a comprehensive view of your home’s activity. Understanding how end-to-end encryption works, especially for your best smart security cameras, is also crucial for overall security.
- Complementary Security: While a smart lock is a great start, consider a holistic approach to home security. Integrating with smart thermostats, smart lighting, and other sensors can create a more robust security posture. Our guides like Solving Common Problems with Your Ring Security Camera or Ring Video Doorbell vs. Nest Doorbell: Which is Best for You? can help you expand your smart home’s security perimeter.
Installing a smart lock is a straightforward process that significantly enhances your home’s security and convenience. By following these steps and best practices, you’ll enjoy the peace of mind that comes with a connected, intelligent front door.
Recommended Video
Frequently Asked Questions
Do I need special tools to install a smart lock?
No, most smart lock installations only require common household tools like a Phillips-head screwdriver, tape measure, and sometimes a drill. No specialized equipment is typically needed.
How long does it typically take to install a smart lock?
For most beginners, installing a smart lock takes about 30-60 minutes, assuming you have the right tools and follow the instructions carefully. It can be quicker with experience.
Can a smart lock be installed on any front door?
Most smart locks are designed to fit standard residential doors with existing deadbolt boreholes. However, it’s essential to check the lock’s specifications against your door’s thickness and backset before purchasing.
